

components ᐅ
1. 8×2SC5200 (NPN) Transistor.
2. 1×C5198 (NPN) Transistor.
3. 1×A1941 (PNP) Transistor
4. 1×TIP42 (PNP) Transistor.
5. 2×C2229 (NPN) Transistor.
6. 2×A1015 (PNP) Transistor.
7. 2×10pF (10) capacitor 100v.
8. 2×470pF (471) capacitor 100v.
9. 1×0.1uF (104) capacitor 250v.
10. 2×100uf capacitor 50v.
11. 1×2.2uf capacitor 50v.
12. 8×0.33Ω (BPR56) resistor 5w.
13. 1×10Ω resistor 5w.
14. 1×4.7kΩ resistor 1w.
15. 2×100Ω resistor 1w.
16. 1×10Ω resistor 1w.
17. 8×10Ω resistor 1/2w.
18. 1×33Ω resistor 1/4w.
19. 3×150Ω resistor 1/4w.
20. 1×1kΩ resistor 1/4w.
21. 1×10kΩ resistor 1/4w.
22. 2×68kΩ resistor 1/4w.
23. 1×33kΩ resistor 1/4w.
24. 2×3.3kΩ resistor 1/4w.
25. 3×1N4007.
26. 1×Zener Diode 24 volt 1w or 1/2w.
27. 1×GJB2510. (25 Amp)
28. 2×10000uf 80V capacitor.
29. 1×5uH coil (1.6mm/ 16 gauge copper wire)
30. 1×2 pin connecter base 2.54 mm.
31. 5×6.3 mm vertical PCB terminal
32. 1×100k single turn potentiometer.
License► ©Technical Mriganka. You can't use this Pcb Layout and Gerber File for commercial purpose. You can use this pcb layout and gerber file only for educational and diy projects.
Gerber File - https://bit.ly/3EoXGd2
PCB Layout & Schematic - https://bit.ly/32tryrt

First Search on Google 'PCBWay'. Then go to pcbway.com

On PCBWay you can get 100x100mm 2 Layer Pcb only at $5. Maximum size pcb you can get 500x1100mm. And maximum Layer is up to 14 Layers.
Then click on - 'Sign in | Join'
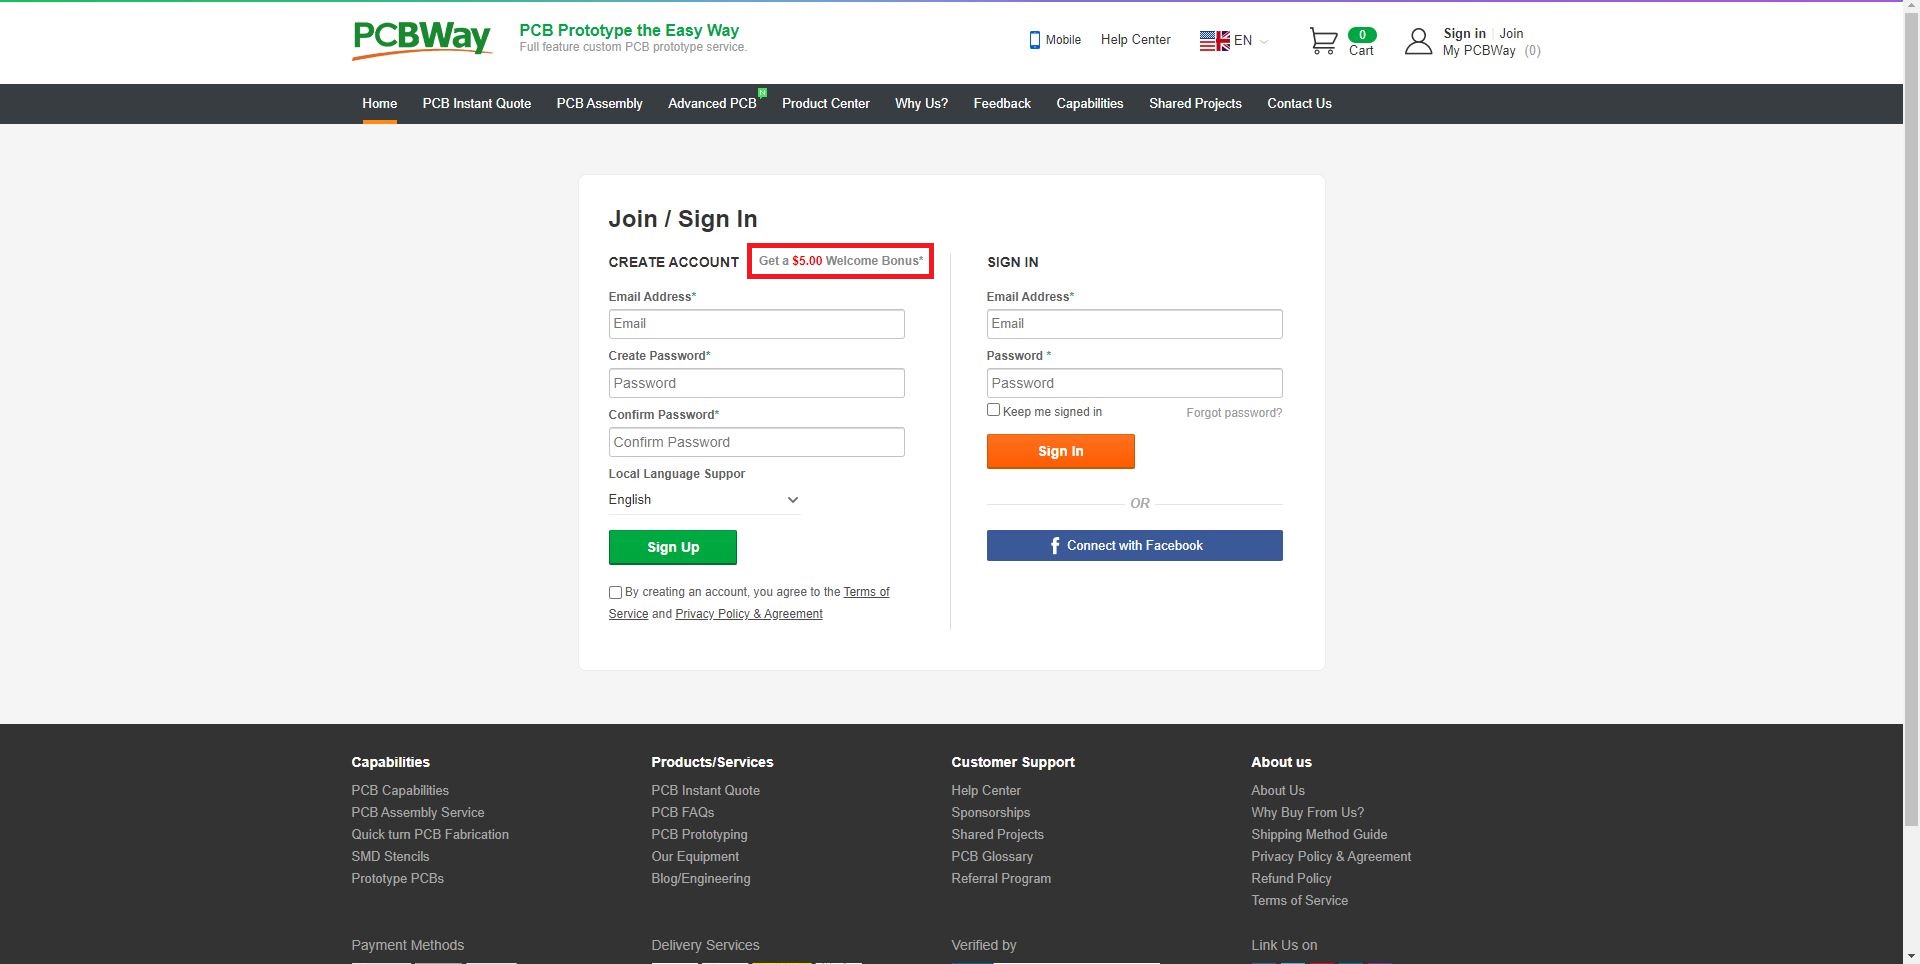
On PCBWay new member Get a $5.00 Welcome Bonus.

After create account click on 'Delivery Address'. Then fill up your Delivery Address.

After fill up Delivery Address, again go to home page of PCBWay.com. Then click on 'Quote Now'

Now here you choose your Pcb option.

After choose your Pcb option click on 'Calculate'. Then choose your country and shipping method. And then click on 'Save to Cart'.

Now add your Gerber File, and then click on 'Submit Order Now'.

After 10 minutes (approx) you will get a message. On the message you will know, your pcb approved or not.

If your pcb approved, reload the page. And then click 'Proceed to Checkout'.

for use your $5 coupon, click on 'Discount coupon'. And then click 'Place Order'.

Now select 'Payment Methods' and then Pay.

After one week I received my pcb. You can see the pcb quality, it's too good.
Specification ᐅ
R.M.S power - 400 Watts at 4Ω.
Frequency Response - 30hz-20khz.
Power Supply - 45-0-45V 8A to 55-0-55V 8A transformer.
Power Supply - 45-0-45V 8A to 55-0-55V 8A transformer.
How to make pcb by ironing method ᐅ
For make pcb you need pcb layout. download the pcb layout and print it by laser printer on photo paper. Then cut the pcb layout. Then press the pcb layout by iron on copper clad board. Press the iron 10-15 minutes. Then leave the pcb for cool down 10 minutes. when the pcb was cool, put the pcb in water and move the pcb layout to copper clad board. Then put the pcb in ferric chloride [FeCl3+H2O] for etching 10-15 minutes. when etching was end, clean the pcb by water. Then make hole on pcb. And then press the upper side print of pcb. Now your pcb is ready, mount components by instruction.
For make pcb you need pcb layout. download the pcb layout and print it by laser printer on photo paper. Then cut the pcb layout. Then press the pcb layout by iron on copper clad board. Press the iron 10-15 minutes. Then leave the pcb for cool down 10 minutes. when the pcb was cool, put the pcb in water and move the pcb layout to copper clad board. Then put the pcb in ferric chloride [FeCl3+H2O] for etching 10-15 minutes. when etching was end, clean the pcb by water. Then make hole on pcb. And then press the upper side print of pcb. Now your pcb is ready, mount components by instruction.
Watch This video for how to make Pcb by ironing method
How to test this amplifierᐅ
After complete this board don't forget to series light test.
After complete this board don't forget to series light test.

When you will on this amplifier via series light, it glow for some time (1 - 2 sec). Then series light will turned off fully. If the series light will fully turned off, then check the voltages.

First check driver stage. Connect the black probe of multimeter, on Ground and red probe on A1941 Collector, you get - volt (-65 to -67V). And on C5198 Collector, you get + volt (+65 to +67V).

Then check Biasing of this amplifier. Connect the black probe of multimeter, on Ground and red probe on TIP42C Collector. You get = 0.5 to 0.8V (Usually we get 0.5V to 0.7V. But here we get 0.8V, no problem, it will work. However, it will not go above 0.8V)

Then check Speaker Output and Audio Input voltage. Here you get no voltages 0.00V. If you get same voltages, then connect preamplifier to input and connect speaker to output.
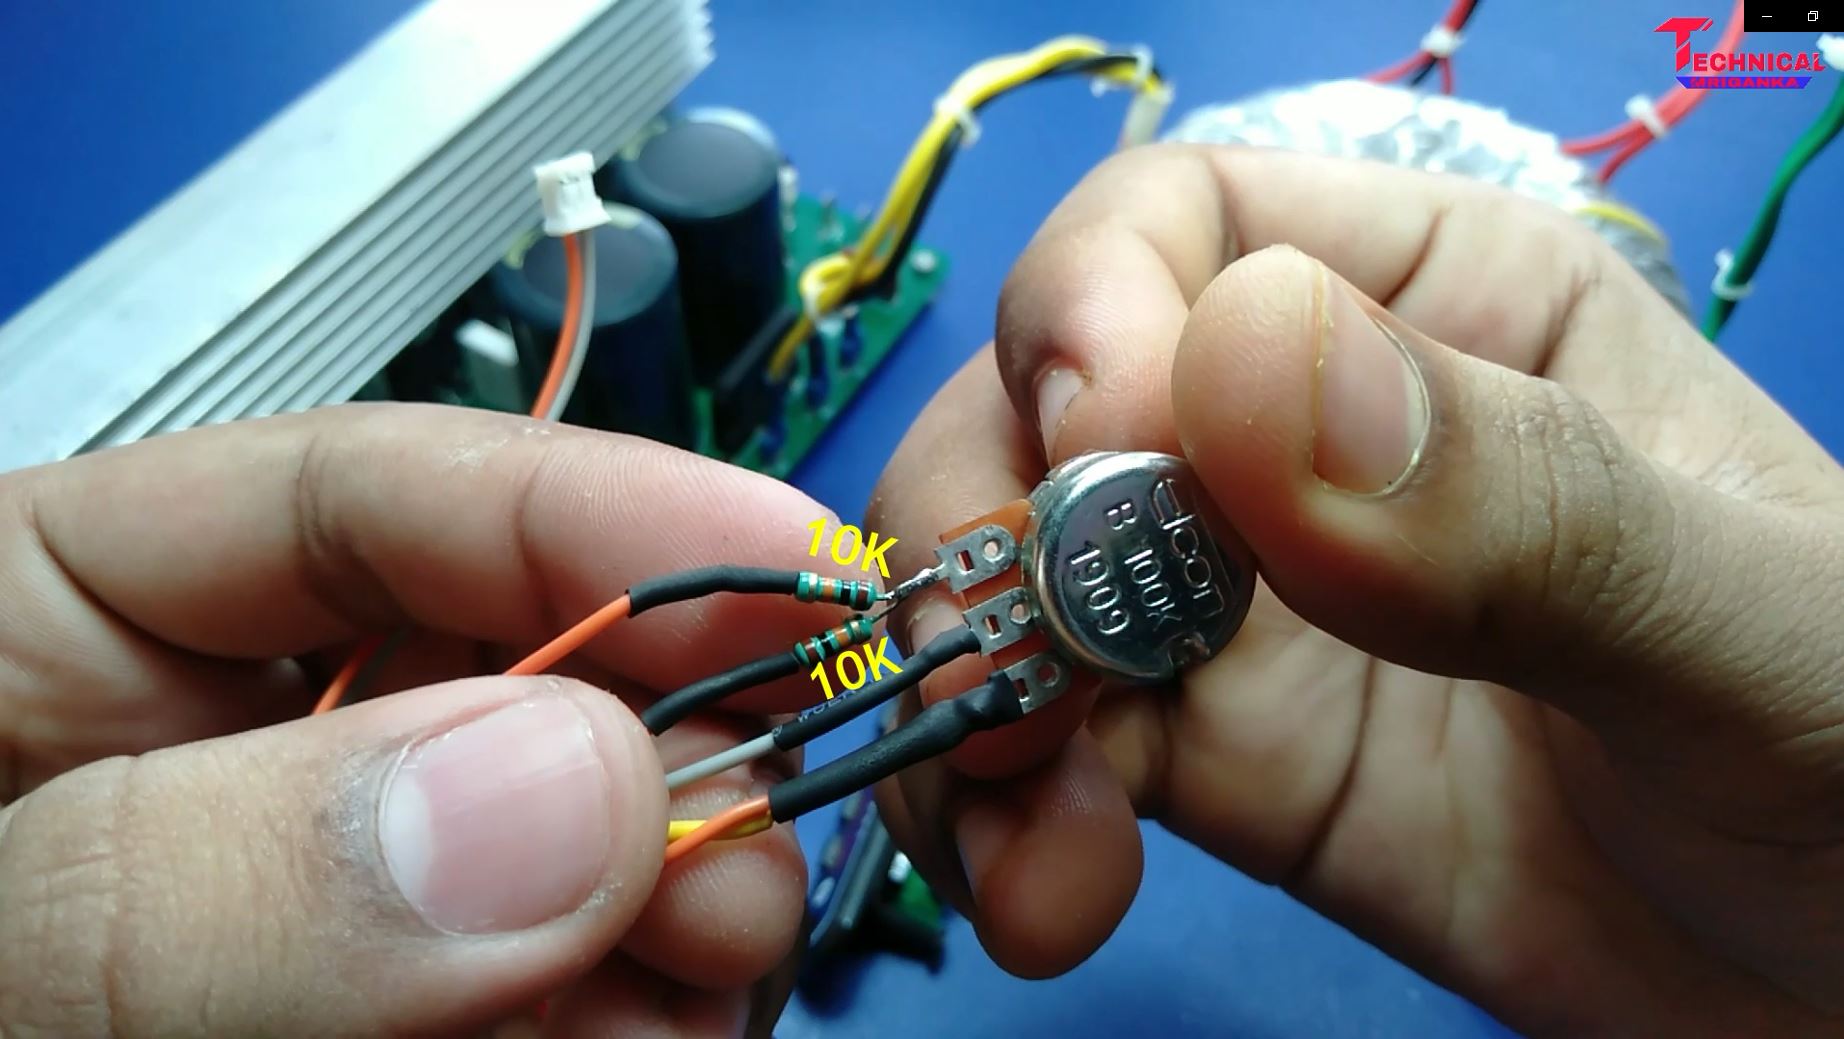
For input you can use 100k single turn potentiometer. If you input from Stereo preamplifier, then connect two 10k 1/4w resistor in input of potentiometer.
Thank you,
Technical Mriganka.
Technical Mriganka.


0 Comments